"When we all think alike, then no one is thinking."
— Walter Lippman

Showing posts with label book arts. Show all posts

Thursday, March 24, 2011

Red Leather and Centipedes

I like to recycle good usable materials whenever possible, and frequent trips to thrift shops are part of my routine.  On one visit I found a red leather coat that was probably not going to have a future in fashion.  It was an ugly coat, but the leather was beautiful.    I purchased the coat, took it apart and cut book spines. 
This journal was similar to another one I recently put in my store and I wanted to make it different somehow.   It needed a few red centipedes on the cover.....
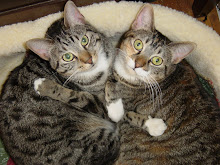
As I was taking pictures of the new book, I suddenly had an assistant.  Chance wanted to get a closer look at that red leather spine.  He couldn't believe it was made from an old coat!
Here is the inside of the cover and the back side of the centipede stitches.  I like to leave them exposed.
Consider how you can recycle interesting and useful materials into your artwork.   Visit your local thrift store and imagine the possibilities.


Wednesday, March 2, 2011

Painted Canvas Covers


 One of my students recently gifted me with several rolls of fine artist's canvas.  Within hours a large section of the canvas was on my work table getting painted for book covers.    The painted canvas is adhered to heavy book board, resulting in a very sturdy journal cover.  
This example shows a strap binding with heavy leather.   Signatures are attached with a version of the longstitch binding method.  
With this new supply of canvas, the plans are to make a few more of these and continue to experiment with alternate cover treatments.   It's always an adventure and so much fun to play.
You will find this journal and others in my Etsy Shop.

Monday, December 20, 2010

Notebook Journals

What does a book maker do with all of the papers left over from her projects?
Make Notebook Journals, of course!
I had a huge collection of paper accumulating by my cutting board and now most of it has been put to good use in these fun little books. 
They measure 4 x 6 and have a variety of papers for the pages. 
   

Sunday, November 14, 2010

Painted Journals

Recent experiments with hand painted journal covers have been productive.  I have been using heavy recycled cover boards from discarded books and given them a new look with acrylic paints.  The painting technique involves starting with a background color and then adding a variety of colors with 'found object' stenciling.  Very fun to do and I like the playful results.  
The front and back covers are painted at the same time to allow continuity of colors, but they are each unique in all other respects.

Here is another color variation using a violet base color.
The pages are a variety of papers, including watercolor, heavy illustration and high quality text weight papers.   These would be perfect to use as visual journals.    

You can find a variety of hand made books like these in my Etsy shop.  

Monday, July 26, 2010

Small Journals

Petite and portable, this small journal is perfect for travel and carrying in a bag for making notes and quick sketches.   
The small format also allows me to use some of the papers left over from larger projects.
I like the way the "Bottle Cap Button" looks oversized in this proportion.......

Here is your art challenge:  Get out the lovely papers and materials that you have saved from other projects and make something wonderful.

Friday, April 2, 2010

More Fun With Bottle Caps

OK, so I think I'm on a roll with this bottle cap thing.....  It's way too much fun to play with and I can't seem to stop.  As you can see there are still some unused buttons waiting for their books so there must be more to do.    I've been so busy making the books that I haven't gotten them listed on Etsy yet, but that will happen soon.   
So many beverages, so little time.... pass me a cold one and a bottle opener please.

Saturday, February 20, 2010

Dark Journal


I've got that centipede bug again.   I have been experimenting with different cover treatments and discovered a technique that works really well to create a very durable and interesting surface.   It's a process of layering papers, mediums and pigments onto heavy book boards.   The results: an intriguing leather-like finish.  
The materials used on these covers are vintage clothing patterns, satin varnish and a variety of brown pigments.  
I can hardly wait to try out some other types of paper with this method.  Oh the possibilities!

Initially the book covers were unembellished, but somehow the black waxed linen jumped into my hands and before I knew it, a centipede was marching across the covers.
You can find this journal and other similar ones for sale at my Etsy Shop.

Monday, November 30, 2009

More Centipedes

Now we're having fun! A bit on the dark side this time, which is good if you're playing with centipedes.
A new shipment of waxed linen cord arrived today...... I think I'll be needing it.
There may still be more of these waiting to come out and play. That's what is so fun about art, you just never know what will happen next.

Saturday, November 28, 2009

Fun with Centipedes

Here's my latest book-play. I was in the mood for centipedes and lots of them.
So once I got started it was hard to stop. Just one more I kept saying to myself....
The book measures 5 x 7 and has 112 leaves of mixed paper types and weights. There are pages for writing and pages for drawing or mixed media journaling.
Although this particular book is finished, I don't think I'm done playing with this stitch. I may have caught the bug.

Sunday, September 6, 2009

Handbook

During a recent trip to our local antique mall, a pair of vintage ladie's gloves accompanied me to the check out. Although they were much too small for my large hands, I knew at once they would find a place on the cover of a book. The soft white leather was worn in distinctive creases as a woman's hands were protected decades ago. These gloves had been well used and I wondered about the person who had carried them in her pocket and slipped them on casually over and over again. The gloves now hold a book for an artist to use. Pages are made of thick papers for mixed media or watercolor and the book should be a delight to fill.
The gloves are stitched directly to the covers of an antique book with white waxed linen. The spine of the book has been replaced with reinforced vintage cloth and pages are attached with harlequin binding. There are 4 signatures of 10 pages hand torn from artist quality papers.

Thursday, May 14, 2009

Fun With Tyvek

These lovely objects are made from recycled Tyvek mailing envelopes! Since they are almost indestructable I have used them as embellishments on the covers of some of my books: This example also has beadwork, which is stitched through the Tyvek and onto the cover with equally indestructable 'fireline.'
Back to the Tyvek..... here is a brief description of the process used to create the ornaments.
You will need a Tyvek mailing envelope, stamp pad inks or other permanent colored inks, a teflon pressing cloth, a piece of scrap paper, iron, and metallic acrylic paints (optional). Work in a well ventellated room.
First, open up the envelope so the blank side is fully exposed. Use permanent colored inks (almost any kind works) to color the entire surface. I use stamp pads that are permanent when heat set. Blend several colors together if you like. Allow this to dry and cut the Tyvek into pieces about 3 to 4 inches square.
Here is the tricky part..... place a Tyvek piece on scrap paper under your teflon pressing cloth and press straight down with a hot iron for JUST A FEW SECONDS then lift the iron straight up. Check to see the results. If your Tyvek did not scrunch up then you must press briefly again. If you keep the heat on it too long, the Tyvek will simply begin to desintegrate. Be prepared to experiment (play) with this to get the feel of just how long to apply the heat. It is very fun and somewhat addictive to watch when the little piece scrunches up properly.
When your embellishments are done, you can use a sponge to lightly apply metallic acrylic paint to accent the high parts. This accentuates the wonderful random patterns that happen.
These ornaments can be used in many different ways.
I have used these in collage also, and am working on a series I hope to post here in the future.
As always, HAVE FUN.
Related Posts with Thumbnails
If you have come this far and want to see more, please click on the words "Older Posts" above.