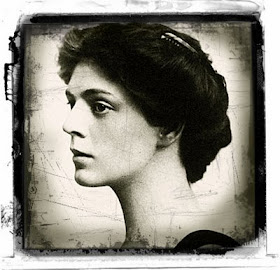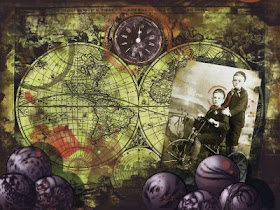
When beginning an illustration, I usually have no preconceived idea where it will go or what the finished work will look like. The story unfolds as layers are created and often the end result is a total surprise. This is the way I like to work, implying an untold story that the viewer can participate in, leaving clues and evidence of what might have happened. There is no absolute answer and the story can change at any given moment.
I am reminded of an old Calvin and Hobbs cartoon in which Calvin is working on a paint-by-number painting. Hobbs, looking over his shoulder remarkes "Hey, that's not right.... you're supposed to follow the numbers!" Calvin's reply: "But then my picture would look just like the one on the box..... " Calvin gets it.
Friday, May 22, 2009
Wednesday, May 20, 2009
Spring Haiku
The theme for this month's exchange is nesting and haiku. As I was working, my husband came up to the studio and in our conversation I learned that he had never written a haiku. I explained the concept to him and within minutes he had composed this one.
Maybe you too would enjoy writing a spring haiku...... first line 5 syllables, second line 7 syllables, third line 5 syllables.
Thursday, May 14, 2009
Fun With Tyvek
These lovely objects are made from recycled Tyvek mailing envelopes! Since they are almost indestructable I have used them as embellishments on the covers of some of my books: This example also has beadwork, which is stitched through the Tyvek and onto the cover with equally indestructable 'fireline.'
Back to the Tyvek..... here is a brief description of the process used to create the ornaments.
You will need a Tyvek mailing envelope, stamp pad inks or other permanent colored inks, a teflon pressing cloth, a piece of scrap paper, iron, and metallic acrylic paints (optional). Work in a well ventellated room.
First, open up the envelope so the blank side is fully exposed. Use permanent colored inks (almost any kind works) to color the entire surface. I use stamp pads that are permanent when heat set. Blend several colors together if you like. Allow this to dry and cut the Tyvek into pieces about 3 to 4 inches square.
Here is the tricky part..... place a Tyvek piece on scrap paper under your teflon pressing cloth and press straight down with a hot iron for JUST A FEW SECONDS then lift the iron straight up. Check to see the results. If your Tyvek did not scrunch up then you must press briefly again. If you keep the heat on it too long, the Tyvek will simply begin to desintegrate. Be prepared to experiment (play) with this to get the feel of just how long to apply the heat. It is very fun and somewhat addictive to watch when the little piece scrunches up properly.
When your embellishments are done, you can use a sponge to lightly apply metallic acrylic paint to accent the high parts. This accentuates the wonderful random patterns that happen.
These ornaments can be used in many different ways.
I have used these in collage also, and am working on a series I hope to post here in the future.
As always, HAVE FUN.
Wednesday, May 13, 2009
Hand Bound Visual Journals
I have been busy making more hand bound visual journals. I've made a series of this design, which is one I like to use myself. These have a variety of hand torn papers for mixed media: Lenox, Strathmore Artagain, and heavy drawing paper. Since the book opens flat, it is easy to work on the pages. The size (5 x 7) is just right for slipping into a bag, along with a few pens and markers and it's easy to hold on your lap for little watercolor sketches and journal entries.
The leather used for spines is upcycled from discarded leather coats. There are so many materials that can be re-used in creative ways.
I have always loved the look and feel of well worn vintage books and have tried to create a bit of that here while designing an inviting "take along" visual journal for mixed media artists.
The covers are made with book board and canvas that has been slightly darkened around the edges for a comfortable vintage appearance.
The spine has exposed binding in a "Harlequin Stitch." This is a rather unusual technique that involves crossing threads between 2 signatures at a time. It is a challenging one to learn.
I use waxed linen for strong bindings and like the way it looks against the spine.
Here is a close up of the stitching. I have found that using a very small leather punch for the holes is preferable to an awl for this binding.
You can see more books like this and other designs at my Etsy shop.
Friday, May 8, 2009
Happy MOTHer's Day
Wednesday, May 6, 2009
Photo Transfer Edge Effect
If you are learning photoshop and want to try some special effects, you will be pleased to know there are some great tutorials on the web. An example is this tutorial by "PSHERO" for a photo transfer edge effect. This was my first attempt at the technique and it was easy to follow his instructions. There were screen shots of every step, which was very helpful. I would advise printing off the tutorial so you don't have to keep switching screens as you learn.
Here are more tutorials by PSHERO.
Have fun!
Have fun!
Tuesday, May 5, 2009
Color Play
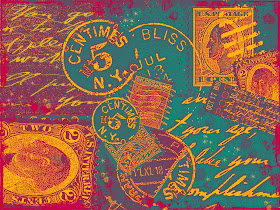
One of the things I like about playing with images in photoshop is the ability to alter colors and textures. The above example started out as a random collection of post card stamps and writings scanned into the program and arranged in layers. The posterize filter was used, colors were altered, and various brushes were used as stamps to create additional texture. You can see the original image below for comparison.
I like the way this turned out and may use it as a backing on some of my ATCs.
Friday, May 1, 2009
Feel the Gladness of May
Every year at this time the bluebells come out along the Greenbelt. The blooms last for about a week, creating a sea of blue on the forest floor and a cloud of fragrance that hangs in the air. It is intoxicating to the senses, and an annual event not to be missed. This year there has been some minor flooding from a recent rain storm and the trails have turned to thick mud. Nonetheless, it was worth getting feet caked with goo to 'feel the blue' again. These photos were taken in the early evening at a primitive park called "The Bird Sanctuary." You can click on the photos to enlarge them.